Moving a piano without damage starts with understanding that these instruments combine heavyweight with delicate internal parts. Upright pianos typically weigh 300-500 pounds, while grands can exceed 1,200 pounds. This article walks you through the important equipment, proper techniques for both upright and grand pianos, route planning, floor protection, and safety measures that prevent costly damage to your instrument and property.
Essential Piano Moving Equipment and Supplies
Before attempting to move your piano, gathering the right equipment makes the difference between success and disaster. The following items will protect both your instrument and property throughout the moving process:
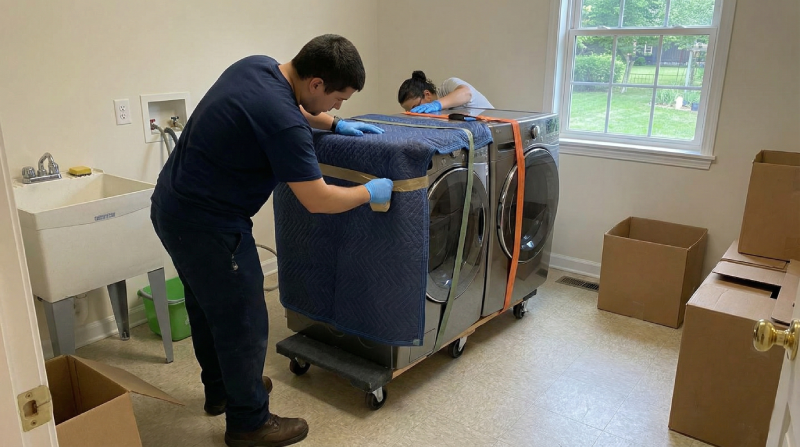
- A heavy-duty four-wheel piano dolly rated for at least 800 pounds, which distributes weight evenly and features non-marking wheels that protect your floors.
- A padded piano skid board for grand pianos, providing a stable platform once the legs are removed.
- At least four thick moving blankets to wrap the entire instrument, preventing scratches and absorbing minor impacts.
- Low-stretch ratchet straps rated for your piano's weight to secure blankets and anchor the instrument during transport.
- Work gloves for hand protection and improved grip.
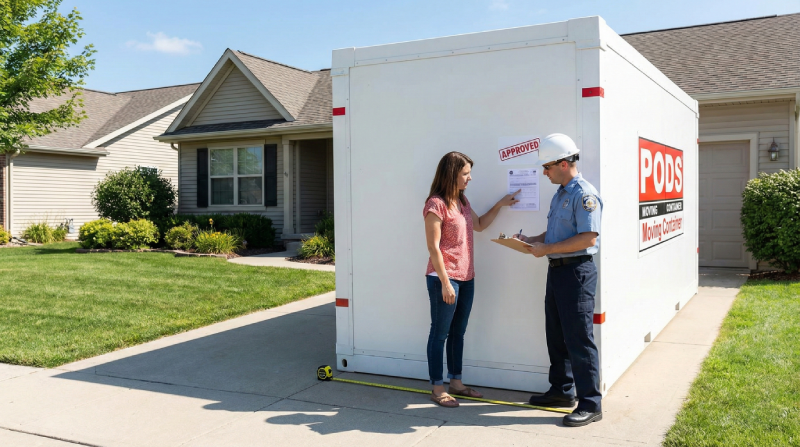
- A measuring tape to verify clearances through doorways and hallways.
Specific Piano Moving Materials
Beyond these basic moving supplies, you'll need materials designed to protect your floors and make safe loading easier.
Floor protection materials like hardboard or plywood sheets prevent damage to both hardwood and carpeted surfaces. These rigid sheets distribute the piano's weight across a larger area, reducing pressure points that could create permanent indentations.
Finally, a loading ramp or vehicle with a liftgate eliminates the dangerous lift required to get your piano into a moving truck. This equipment investment may seem high, but it costs far less than repairing damage from an attempted move without proper tools.
Piano Moving Team Assembly and Safety Planning
Moving a piano safely requires at least four to six strong adults, regardless of the instrument's size. Each person serves a specific role during the move. Designate one person as the "caller" who coordinates all movements and communicates commands clearly. This person doesn't lift but watches for obstacles and guides the team through tight spaces.
Assign your strongest team members to the piano's heaviest end, typically the keyboard side for uprights or the straight side for grands. Two additional people act as spotters, watching for hazards and stabilizing the instrument during movement. Everyone should understand basic lifting techniques: bend at the knees, keep their backs straight, and lift with leg muscles rather than back muscles.
Before moving day, conduct a team meeting to review the entire process. Walk through the route together, identifying potential challenges like stairs, narrow doorways, or uneven surfaces. Establish clear communication signals for stopping, adjusting position, or taking breaks. Remember that moving slowly and carefully prevents most accidents and damage.
Measuring and Mapping Your Piano Moving Route
Accurate measurements prevent the frustration and danger of discovering your piano won't fit through a doorway mid-move. Measure your piano's height, width, and depth, accounting for any protruding parts like pedals or decorative elements. Grand pianos require special attention since they'll be moved on their side, changing their effective dimensions.
Map every inch of your moving route, measuring doorway widths, hallway turns, and stairwell clearances. Standard doorways measure 32 inches wide, but older homes may have narrower passages. Calculate whether you'll need to remove doors from their hinges or navigate at specific angles. Pay attention to ceiling heights, especially in stairwells, where you might need to tilt the piano.
Create a written plan noting exact measurements and potential obstacles. Mark areas where you'll need to protect walls or floors, and identify rest points where the team can safely set down the piano if needed. This detailed planning prevents damage from rushed decisions during the actual move.
Preparing Your Piano for Moving
Proper preparation protects your piano's delicate components and finish during transport. Start by removing all items from the piano's top and interior, including sheet music, metronomes, and decorative objects. Close and lock the keyboard lid to prevent keys from being damaged or creating leverage points that could break the lid.
For grand pianos, secure the lid with blankets and straps rather than relying on the lock alone, which could break under stress. The pedal lyre must be removed and wrapped separately, as leaving it attached risks expensive damage to both the lyre and piano body.
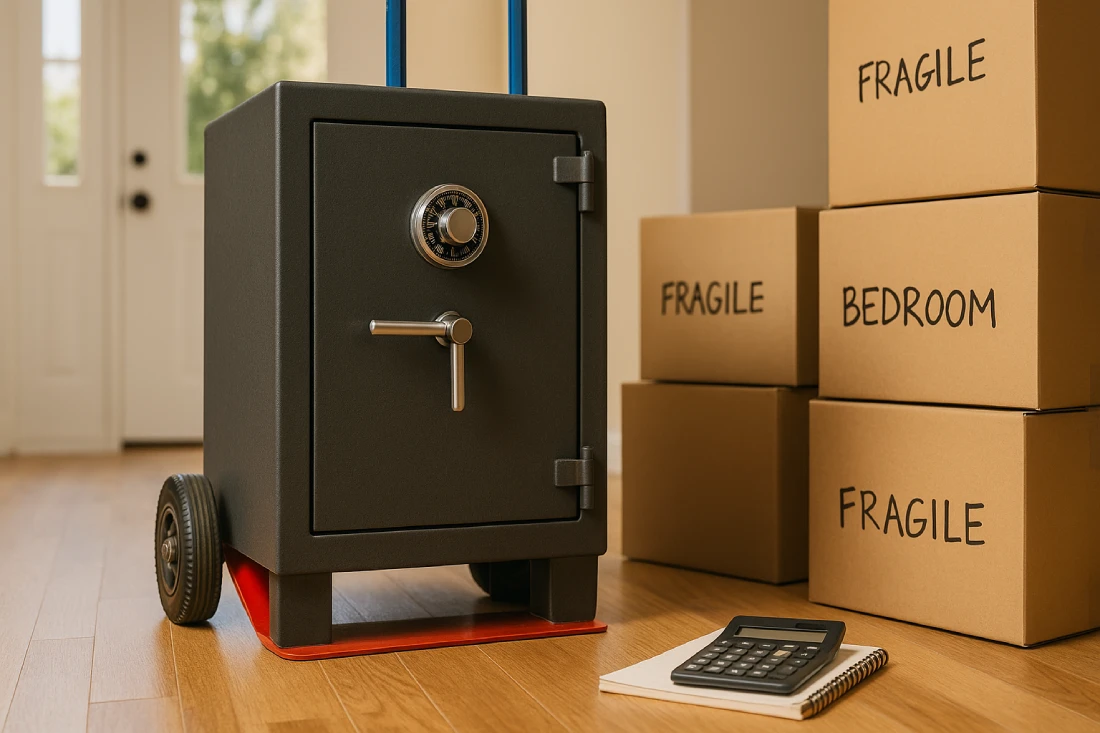
Document the piano's current condition with photos, noting any existing scratches or damage for insurance purposes. This documentation provides protection if you need to file an insurance claim later.
Now you're ready to wrap the piano. Start with the most vulnerable areas, like corners and the keyboard area, then work your way around the entire instrument with moving blankets. Secure blankets with ratchet straps rather than tape, which can damage the finish.
The wrapped piano should have no exposed surfaces, and blankets should overlap to prevent gaps. This protective layer serves three purposes: it guards against scratches, absorbs minor impacts, and provides grip points for movers to safely handle the instrument.
Step-by-Step Piano Moving Instructions
The specific techniques for moving pianos vary significantly based on the instrument type. Each requires careful attention to weight distribution and proper equipment use to prevent damage.
Moving Upright Pianos Safely
- Position the piano dolly perpendicular to the piano's back, sliding it carefully underneath until the dolly's crossbar sits directly under the piano's center of gravity (about one-third of the way back from the keyboard).
- Secure the piano to the dolly using ratchet straps, creating an X-pattern across the back for maximum stability. Professional movers often use industrial-grade straps rated for 1,000+ pounds to make sure the piano remains locked in position throughout the move.
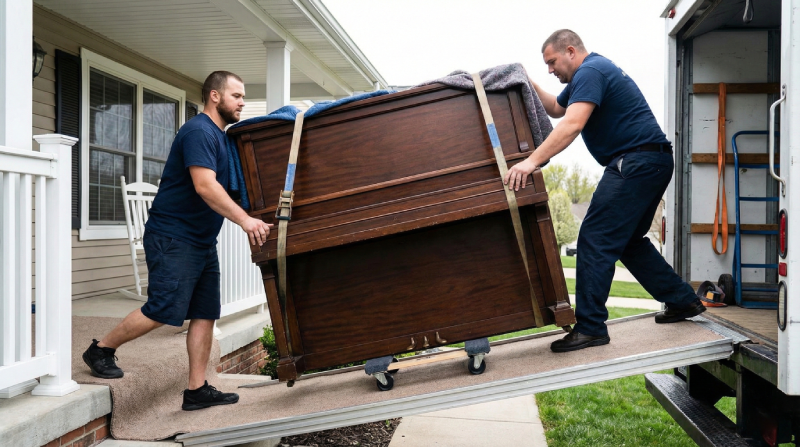
- With one person guiding from the front and others supporting the sides, slowly tilt the piano back onto the dolly at about 15 degrees. This is enough to clear the floor but not so much that it becomes unstable. This angle prevents the piano from tipping while maintaining control during movement.
- Move carefully, with the caller announcing each turn or obstacle. Never use the piano's original casters for moving across rooms, as they're designed only for minor adjustments and will damage both the casters and your floors under the stress of actual moving.
- When encountering doorways, approach at an angle if the piano is too wide to fit straight through. One side enters first while spotters guide the other side through. If the clearance is tight (within an inch), consider removing the door from its hinges rather than forcing the piano through.
- For threshold transitions, use a ramp or have team members lift slightly while maintaining the dolly's position. This prevents jarring impacts that could damage the piano's internal mechanisms. Professional movers use beveled transition ramps to smooth these height changes.
Moving Grand and Baby Grand Pianos
- Remove the pedal lyre first, carefully disconnecting the pedal rods and storing all hardware in labeled bags. Take photos before disassembly to guide reassembly later.
- With your team supporting the piano's weight, remove each leg according to the manufacturer's design, whether they unscrew or require bracket removal. Have at least three people supporting the piano body as each leg comes off to prevent sudden drops.
- Position your piano board alongside the straight side of the grand piano. The board should be padded and rated for at least 1,500 pounds to safely support even smaller grand pianos.
- With adequate team support (minimum five people for this step), carefully tip the piano onto its side onto the board, with the keyboard facing up. This orientation protects the delicate action mechanism and prevents key damage. One person should guide the keyboard side while others control the descent.
- Wrap the entire piano body on the board with blankets and secure everything with multiple straps. Use at least four straps in a crisscross pattern so no part of the piano can shift during movement.
- Roll the grand piano slowly like a large rectangular object, with team members stationed at each corner to maintain stability and guide movement. Never attempt to navigate stairs with a grand piano on a board. This requires specialized stair-climbing equipment that professionals use.
Caution: Professional piano movers often use specialized equipment for this process, and attempting to move a grand piano without proper equipment significantly increases damage risk.
Protecting Floors and Property During Piano Moving
Floor protection starts before the piano moves an inch. Lay hardboard or plywood sheets along your entire route, creating a smooth pathway that distributes weight evenly. Overlap sheets by at least six inches and tape seams to prevent catching. This investment in materials costs far less than refinishing damaged hardwood or replacing torn carpet.
Protect doorways and corners with moving blankets or corner guards. Pianos often need to pivot through doorways, bringing them dangerously close to frames and walls. Foam pipe insulation split lengthwise makes a good temporary door frame protection. Remove artwork and furniture from the moving path by learning proper furniture moving techniques, eliminating collision risks, and creating maneuvering space.
Consider the cumulative weight stress on floors, especially in older homes. A 500-pound upright piano plus four movers can exceed 1,000 pounds of concentrated weight. Spread this load using your protective sheets, and avoid stopping on unsupported floor sections between joists.
Loading and Transporting Your Piano
Loading represents one of the most dangerous phases of piano moving. Position your truck's ramp at the gentlest possible angle, using a longer ramp if available to reduce the incline. The piano should enter the truck first, positioned against the front wall for maximum stability during transport.
Inside the truck, the piano must stand upright (never on its side for uprights) against a solid wall. Grand pianos on boards can lie flat if properly supported across their entire length. Use multiple ratchet straps to secure the piano to the truck's walls, preventing any movement during transport. Add additional padding between the piano and truck walls, and use furniture or mattresses to create a barrier preventing the piano from sliding.
During transport, drive carefully and avoid sudden stops or sharp turns. The piano's weight creates significant momentum that can break inadequate securing methods. Plan your route to avoid steep hills, rough roads, or low bridges that might require sudden maneuvers.
Unloading and Placing Your Piano
Unloading follows the reverse process of loading but requires equal care and attention. Position your ramp and verify that all team members understand their roles before beginning. Move slowly down the ramp, with the caller watching for any shifts in the piano's position or stability.
Once inside the destination, place your piano in its new location, considering several factors. Avoid exterior walls in climates with significant temperature variations, as this can affect tuning stability. Keep the piano away from heating vents, radiators, and direct sunlight, which cause wood expansion and contraction. Leave at least three inches of space behind the piano for air circulation.
The ideal room maintains consistent temperature and humidity levels. Rapid environmental changes stress the wood and metal components, potentially causing cracks or warping. Position the piano where it won't need frequent moving, as each relocation increases damage risk.
Post-Move Piano Care
After moving, your piano needs time to adjust to its new environment before tuning. The wood, felt, and metal components must adjust to the new room's temperature and humidity levels. This stabilization period typically takes two to four weeks, though pianos moved long distances or experiencing significant climate changes may need longer.
Resist the temptation to play the piano heavily right after moving. While you can test the keys and pedals for proper function, heavy playing before the instrument settles can stress components that are already adjusting to environmental changes. Monitor the room's humidity with a hygrometer, aiming for 40-45% relative humidity for optimal piano health.
Schedule a professional tuning after the adjustment period. Even carefully moved pianos experience tuning changes from the physical vibrations and environmental shifts. A qualified technician can also inspect for any damage that might not be immediately visible, addressing issues before they become expensive repairs.
Common Piano Moving Mistakes and How to Avoid Them
Even experienced DIY movers make preventable mistakes that damage pianos or cause injuries. Understanding these common errors helps you avoid expensive repairs and makes for a successful move.
Moving with Too Few People
Attempting to move a piano with too few people ranks as the most dangerous mistake. Fatigue leads to dropped pianos, injured backs, and damaged property. Four people represent the absolute minimum for the smallest uprights, while grand pianos need six or more. When you consider the cost of potential medical bills or piano repairs, recruiting adequate help or comparing DIY moving versus professional moving services becomes economically sensible.
Using the Piano's Built-in Casters
Using the piano's built-in casters for moving across rooms destroys both the casters and your floors. These small wheels are designed only for minor positioning adjustments, not transportation. The concentrated weight creates deep grooves in hardwood and tears carpet fibers. Always use proper moving equipment designed for the piano's full weight.
Skipping Measurements
Skipping measurements leads to pianos stuck in doorways or dangerous last-minute tilting attempts. Every inch matters when navigating tight spaces. Measure twice and create backup plans for challenging passages.
Lifting by Legs or Pedals
Never lift a piano by its legs or pedals, which aren't designed for weight bearing and will break under stress. These components are purely functional or decorative and cannot support the instrument's full weight during lifting.
DIY vs. Professional Piano Moving Comparison
DIY piano moving can work for local, single-floor moves when you have the right equipment, enough helpers (at least four for uprights, six for grands), and time to plan. This approach saves $200-$600 in professional fees and gives you full control over timing and handling. If you're moving a modest upright piano across flat surfaces without stairs or tight doorways, and you've bought quality dollies and protective materials, DIY moving can work for those comfortable with heavy lifting.
When Professional Piano Movers Are Worth the Investment
Stairs make the job much harder and more dangerous, requiring specialized stair-climbing equipment that professionals use to keep the piano stable while moving it safely. Valuable or antique pianos need professional handling. The cost difference between DIY and professional moving is small compared to repair costs for a damaged Steinway or family heirloom. Professionals carry specific insurance for piano damage and know how to handle high-value instruments.
If you don't have proper equipment or enough helpers, attempting a DIY piano move is dangerous. Professional movers bring both the tools and experienced teams needed for safe transport. Specialized loading and unloading services for heavy items can often finish in hours what might take inexperienced movers all day, reducing stress on the instrument.
DIY Piano Moving Cost-Benefit Analysis
Professional movers charge $200-$600 for local moves. Compare that to the hidden costs of DIY: equipment rental ($100-150), potential medical bills from injury, floor or property damage, and piano repair costs if something goes wrong. A single soundboard crack can cost thousands to repair, often more than the piano's value. For moves involving any complexity beyond a simple horizontal move, professional expertise provides both safety and peace of mind that's worth the cost.
Moving Your Piano Successfully Without Damage
Moving a piano safely requires three things: quality equipment rated for the weight, enough experienced hands (at least four for uprights, six for grands), and protecting every surface along the route. The $50-100 spent on proper dollies and blankets prevents thousands in repair costs. For moves involving stairs, valuable instruments, or tight spaces, professional movers bring specialized equipment and insurance that DIY efforts can't match. Explore labor-only moving services to handle the heavy lifting while you manage the rest.
Frequently Asked Questions
Does moving a piano automatically damage it?
No, proper moving techniques with the right equipment and help can relocate a piano without any damage. Most damage happens from poor preparation or trying to move without proper equipment.
What's the minimum number of people needed to move an upright piano?
Four strong adults at minimum, with one person acting as a spotter who guides but doesn't lift.
Can I move a piano in a pickup truck?
Yes, if properly secured, though enclosed trucks provide better protection from weather and road debris during transport.
Should I remove the piano's legs myself?
Only attempt leg removal on grand pianos if you understand the specific mechanism, as improper removal can damage both legs and the piano body.
How much does professional piano moving typically cost?
Professional piano movers typically charge $200-$600 for local moves, depending on piano type, distance, and obstacles like stairs.
Will homeowner's insurance cover DIY piano moving damage?
Most policies exclude damage during DIY moves, so check your specific coverage before attempting to move valuable instruments yourself.
Can a piano be permanently damaged from one bad move?
Yes, dropping a piano or severe tilting can crack the soundboard, frame, or pinblock, potentially totaling the instrument.
Is it safe to move a piano in winter weather?
Extreme temperature changes stress piano components, so allow extra time for the piano to adjust and protect the instrument from moisture during winter moves.


.webp)